What you need on the server
Check the version and architecture first. You need Debian 12 or 13, on amd64 or arm64:
cat /etc/debian_version
dpkg --print-architecture- A minimal install may not have what the next steps use. As root: apt install sudo curl gnupg ca-certificates, then usermod -aG sudo bob and log in again. If you gave root a password during installation, sudo may not be set up.
- You already log in with an SSH key, because the key stays your first factor.
- A separate emergency account with its own key, kept offline, which will never be in the gated group.
- A way in that does not use SSH, such as your provider’s web console or a keyboard and screen.
Create an account and an app
SSH with U2 Secured needs an app in the developer portal, because that is what sends the push. The free Developer plan covers it: 1 app, up to 1,000 active users and 100 push approvals a month. Codes from the app and backup codes are never metered.
In the portal, create a new app and name it after the machines it protects, since people see that name on every approval. Copy its API key (rka_…). It is shown once.
Install the package
Add the signed U2 Secured repository and install from it, so that apt upgrade keeps it up to date, security fixes included. Check the key’s fingerprint against the comment before trusting it. Installing it changes nothing yet: no login is affected until you finish the steps below.
curl -fsSL https://u2secured.com/downloads/linux/u2secured.gpg | sudo tee /usr/share/keyrings/u2secured.gpg > /dev/null
gpg --show-keys /usr/share/keyrings/u2secured.gpg   # B725 4213 9302 02C4 8B19  6810 E6C4 2653 4D95 43BA
echo "deb [signed-by=/usr/share/keyrings/u2secured.gpg] https://u2secured.com/downloads/linux stable main" \
  | sudo tee /etc/apt/sources.list.d/u2secured.list
sudo apt update && sudo apt install u2auth
u2auth-admin help
Add the API key to the config
Create the config from the example the package installs, then set three values: api_key, issuer (the name of the code entry in the app) and bypass_users (your emergency account). It holds this server’s API key, which is why it is readable by root only.
sudo install -m 0600 /usr/share/doc/u2auth/u2auth.conf.example /etc/u2auth/u2auth.conf
sudoedit /etc/u2auth/u2auth.conf   # api_key, issuer = your fleet's name, bypass_users = break-glass
Pair your phone
Install the U2 Secured Authenticator on your phone (free on the App Store and Google Play). Then enrol each person who signs in. The commands below use the login name bob.
sudo u2auth-admin enroll bob              # --no-pair: codes only, no phone pairing
sudo u2auth-admin status- Enter the pairing code in the app: Linked tab, then +. It lasts 10 minutes.
- Add the code entry it prints to the app’s Add account screen. This is your offline code.
- Save the ten backup codes somewhere safe. They are shown once.
- Check that status shows the person as paired before going on: someone in the gated group with no paired phone is refused.
Turn it on for SSH
Keep your current SSH session open until a new login works. A mistake in PAM or sshd can lock everyone out, and that session is how you undo it. If you do get locked out, sign in through your provider’s console or at the machine: this setup changes SSH only.
First, tell sshd to ask for the key and then for U2 Secured, for members of a group called u2mfa:
# /etc/ssh/sshd_config.d/u2auth.conf
UsePAM yes
KbdInteractiveAuthentication yes
Match Group u2mfa
    AuthenticationMethods publickey,keyboard-interactive
Add the module to PAM
In /etc/pam.d/sshd, replace the line “@include common-auth” with these three. Members of u2mfa sign in with their key plus U2 Secured, with no password prompt, and everyone else carries on as before.
# /etc/pam.d/sshd — in place of "@include common-auth"
auth [success=ok default=1] pam_succeed_if.so quiet user ingroup u2mfa
auth [success=done default=die] /usr/lib/u2auth/pam_u2auth.so
@include common-auth
Add yourself to the group and reload sshd
sshd -t checks the config first, so a typo stops here instead of reaching the running service.
sudo groupadd u2mfa
sudo usermod -aG u2mfa bob
sudo sshd -t && sudo systemctl reload ssh
Test every outcome from a new terminal
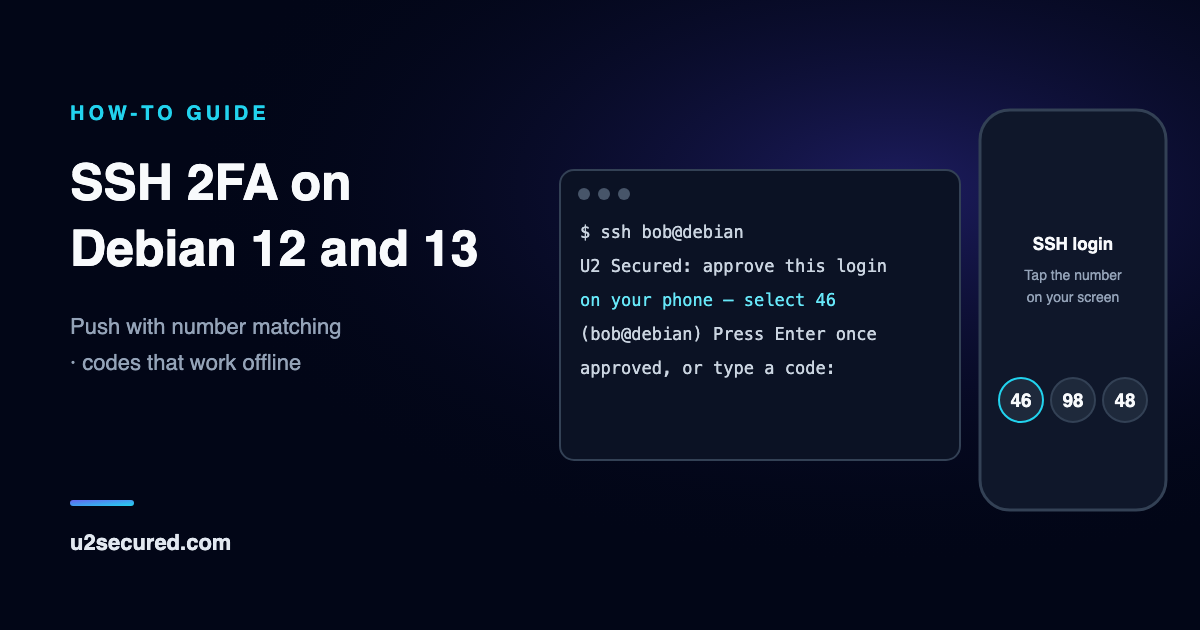
Leave the first session open and try these from a second terminal. Over SSH you press Enter as well as tapping, before or after: OpenSSH only shows the number together with a prompt.
- Log in, tap the number the terminal shows and press Enter: the shell opens.
- Tap a wrong number, or Deny: “Permission denied”, the connection ends, and the phone does not ring again.
- Run sftp as the same user: you get the same prompt, and it works.
- Log in as your emergency account: no prompt, straight through.
Roll out to more Debian servers
One app covers the whole fleet, and each person pairs their phone once. Install the package on each server, then copy each person’s code entry across, so they have one entry in the app for every server. Treat the exported file as a secret. Backup codes do not travel: issue them per server, because a code used on one server would not be known as used on another.
sudo u2auth-admin export bob > bob.totp.json     # treat as a secret
# on every other machine (Ansible, Salt, or by hand):
sudo u2auth-admin import bob bob.totp.json
sudo u2auth-admin backup-codes bob               # optional, per machine
See who signed in where
Registering a server gives it its own key and name in the portal. The phone then says which server a login is on, and the sign-in log lists each login, including the ones a server decided by itself while it was offline, which it reports once it is back. Create a registration token on the app’s Machines tab, then:
sudo install -m 0600 /dev/stdin /root/u2-token <<<'rkr_…'
sudo u2auth-admin register --name web-03 --token-file /root/u2-token
sudo rm /root/u2-token
When U2 Secured cannot be reached
If the server cannot reach U2 Secured, the prompt says so and asks for a code instead. The code from the app and the backup codes are checked on the server itself. Someone with no offline codes is refused, which is the safe default. If U2 Secured or your PAM setup is ever broken and people must get in, run sudo u2auth-admin disable: gated users get in on their key alone, each login is logged, and sudo u2auth-admin enable puts the check back.
U2 Secured or libpam-google-authenticator?
Debian also packages libpam-google-authenticator, a PAM module for one-time codes. If codes are all you want, on a few servers, with no account anywhere, it is a reasonable choice.
U2 Secured is for when you want more than that: a push with number matching instead of typing a code, one entry in the app for a whole fleet, a sign-in log per server, and codes as the fallback when a server is offline.
What this does not stop
A second factor protects the sign-in. It is not a substitute for the rest of a server’s upkeep.
- It does not fix a vulnerable sshd or anything else on the machine: keep installing updates.
- It does not protect the machine from someone who is already root, who can edit PAM or turn the check off.
- Your emergency account skips U2 Secured by design, so its key deserves the most care. Keep it offline.
- Number matching makes an unexpected push much harder to approve by reflex, but a person can still be talked into approving one. Treat any push you did not start as an attack, and deny it.
How we tested this guide
On 2 November 2026 we ran these install commands against the live repository, then our SSH test suite, on Debian 12 and Debian 13, on both arm64 and amd64. Each of the four passed all 32 scenarios: approving, wrong numbers, denials, sftp, tunnels, offline codes, spent backup codes, the sign-in log and logins with the service unreachable.
Those ran in containers with real ssh and sshd and a simulated phone, and amd64 ran under emulation on an arm64 computer. The same package has been run end to end with a real iPhone on Ubuntu on arm64, but not yet on a physical amd64 server.